


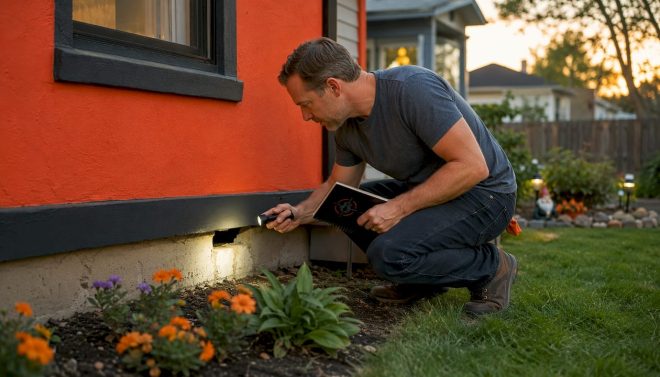
Rodent proofing is the mechanical process of sealing your home against entry, removing what attracts rodents, and managing any animals already inside. The EPA recommends pairing mechanical exclusion with sanitation and monitoring rather than relying on poisons alone. Three pillars drive every effective approach: sanitation (eliminate food, water, and nesting material), exclusion (seal every structural gap with chew-proof materials), and management (trap and monitor to confirm the problem is gone). Miss any one of them and the other two underperform.
Quick-start checklist — do these today:
- Store all food, including pet food, in metal or glass containers with tight-fitting lids
- Remove clutter from attics, garages, and closets that could serve as nesting material
- Close any visible gap larger than a quarter-inch with steel wool or hardware cloth as a temporary fix
- If you see fresh droppings, grease marks, or hear scratching, set snap traps before sealing anything permanently
- Call a professional if activity is active and widespread — Arsenal Pest Control offers inspection and full mechanical exclusion for homeowners across the Queen Creek, Gilbert, Mesa, and surrounding Arizona communities
Pro Tip: Poisons should never be your only defense. The CDC and EPA both emphasize that baits without exclusion and sanitation leave the underlying access problem unsolved. Rodents return. Seal the structure first.
Table of Contents
- How do you remove the attractants that bring rodents inside?
- Where should you look during a rodent inspection?
- What materials actually work for sealing entry points?
- What do you do if rodents are already inside?
- How often should you inspect and what does it cost?
- When does it make sense to hire a professional?
- Key Takeaways
- The prevention-first approach that actually protects your home
- What Arsenal Pest Control does on a first visit
- Authoritative sources and where to read more
How do you remove the attractants that bring rodents inside?
Sanitation is the step most homeowners skip or rush, and it is the reason exclusion work fails within a season. Rodents do not move into a sealed house — they move into a house that offers food, water, and shelter, then find the gap. Remove the incentive first.
Inside your home:
- Transfer dry goods (flour, rice, cereals, crackers) into airtight metal or glass containers — cardboard and thin plastic are not barriers
- Pick up pet food bowls after every meal; never leave food out overnight
- Secure kitchen garbage in a can with a locking or tight-fitting lid
- Fix dripping faucets, sweating pipes, and any open drains — rodents need water daily
- Clear out cardboard boxes, old newspapers, and fabric scraps from attics, basements, and closets
Outside your home:
- Move woodpiles at least 1 foot off the ground and away from the foundation, per CDC guidance
- Keep compost bins away from the house when possible; never add fatty foods, eggs, or dairy to open composters
- Clean grills after every use and store them covered
- Trim grass and weeds back from the foundation; overgrown vegetation is cover and nesting material
- Eliminate standing water in gutters, plant saucers, and low spots in the yard
Most of this takes a few hours on a weekend. The supplies — airtight containers, a locking trash can, basic caulk — cost far less than a single pest service call.
Pro Tip: The most commonly missed interior sanitation step is the space behind the stove and refrigerator. Crumbs accumulate there for months. Pull both appliances out, clean thoroughly, and check for any gap where the utility line enters the wall.

Where should you look during a rodent inspection?
Inspection identifies exactly where rodents are entering and what signs of activity exist. Do this before you seal anything, especially if you are unsure whether animals are currently inside. Sealing an active infestation traps animals in your walls, which creates a worse problem.
Interior checklist:
- Pantry and kitchen cabinets: look for droppings, gnaw marks on packaging, and grease smears along the back wall
- Behind and under appliances: refrigerator, stove, dishwasher
- Basement and crawl space: check where pipes and wires enter through the sill plate
- Attic: look for nesting material, droppings, and chewed insulation near eaves and ridge vents
- Wall voids: listen for scratching, especially at night
- Under sinks: the pipe penetration is one of the most common mouse entry points in North American homes
- Inside closets against exterior walls: feel for cold drafts that indicate a gap
Exterior checklist:
- Foundation: hairline cracks, gaps where the sill plate meets the foundation, weep holes
- Vents: dryer exhaust, bathroom exhaust, crawl space vents — check for torn or missing screens
- Soffits and eaves: look for gaps at the roofline where the fascia board meets the soffit
- Chimney: open tops without caps are a direct highway into the attic
- Garage perimeter: the gap under the garage door and where the door frame meets the concrete
- Utility penetrations: gas lines, electrical conduit, cable, and water supply lines entering the structure
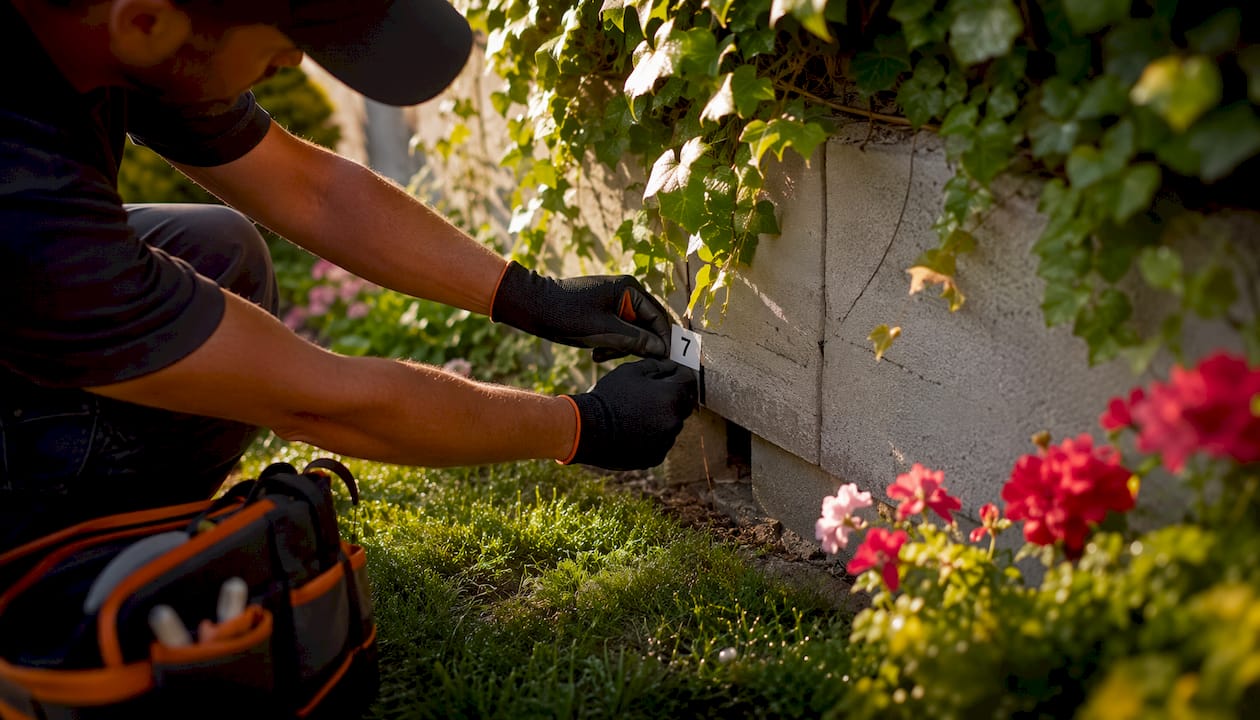
Take photos of every suspected entry point. A simple numbering system (tape a small numbered sticker next to each gap, then photograph it) gives you a reference for DIY repairs and makes contractor quotes far easier to compare.
Pro Tip: Timestamp your photos and note the location in a notes app or spreadsheet. If you hire a contractor, send the photos in advance — a good pro will tell you which gaps they plan to address and which ones you may have missed.
What materials actually work for sealing entry points?
Mechanical exclusion fails when the wrong material goes in the wrong place. Foam sealant alone is not sufficient — rodents chew through it within days. Every gap needs a chew-proof core material, then a permanent surface finish.
Materials comparison
| Material | Best use | Pros | Limitations |
|---|---|---|---|
| Steel wool (stainless or galvanized) | Small gaps, pipe penetrations (temporary pack) | Cheap, flexible, fills irregular shapes | Rusts if galvanized; must be backed with caulk or mesh |
| Copper mesh (e.g., Stuff-It) | Pipe penetrations, small voids | Corrosion-resistant, no rust, flexible | More expensive than steel wool |
| 1/4" hardware cloth (galvanized) | Vents, crawl space openings, soffits | Rigid, durable, widely available | Can rust over time in humid or coastal areas |
| Stainless steel mesh | High-moisture areas, coastal climates | Never rusts, longest lifespan | Higher cost, harder to cut and shape |
| Metal flashing (galvanized or aluminum) | Roofline, chimney base, door frames | Rigid, weather-resistant | Aluminum can be chewed by rodents; use galvanized where possible |
| Mortar / concrete patching | Foundation cracks, masonry gaps | Permanent, rodent-proof when cured | Requires surface prep; not flexible |
| Caulk / sealant | Final surface coat over mesh | Seals air gaps, weatherproofs | Never use alone — always back with mesh |
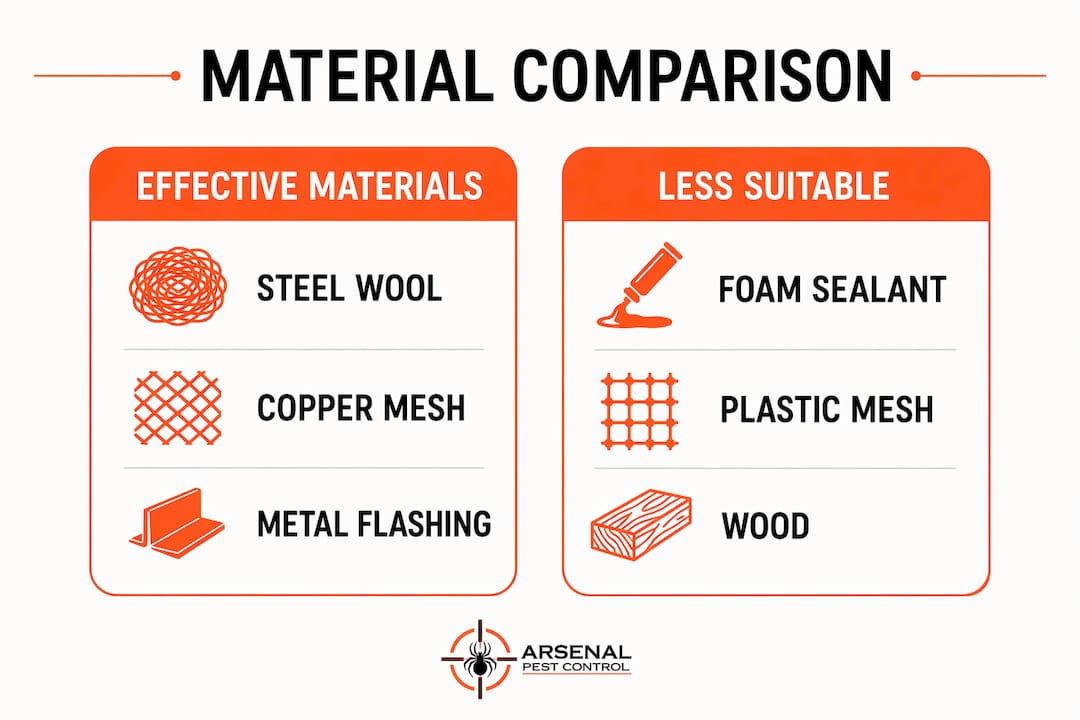
ICWDM guidance specifies that utility penetrations must be packed with metal mesh before any sealant is applied. Foam alone gives rodents something to gnaw against, which they will.
Six common repairs, step by step
Small holes (up to 1/2 inch): Pack tightly with copper mesh or stainless steel wool, then apply paintable caulk over the surface. Let cure fully before painting.
Pipe penetrations: Cut a piece of 1/4" hardware cloth or copper mesh larger than the gap. Pack it firmly into the void around the pipe, then seal the perimeter with caulk or mortar. Secure the mesh with screws and washers — not staples, which rodents can work loose.
Vent covers: Remove the existing screen if damaged. Cut 1/4" hardware cloth to size, attach with screws and washers to the vent frame. The NPS Rodent Exclusion Manual specifies 1/4" mesh for vents to stop mice, which can fit through a 1/4-inch opening.
Door sweeps and thresholds: Install a metal door sweep on any exterior door with a visible gap at the bottom. Metal weather stripping along the door sides handles lateral gaps.
Garage door gap: A rubber garage door bottom seal handles minor gaps. For larger or uneven gaps, a threshold seal bonded to the concrete floor creates a tight contact point.
Chimney caps and flashing: Install a commercially produced chimney cap that meets local fire code. Seal the base flashing with roofing caulk and check that the cap screen is 1/4" mesh or smaller.
Pro Tip: In humid climates or coastal areas, choose 316-grade stainless steel mesh or copper wool over galvanized products. Galvanic corrosion can degrade galvanized mesh within a few years in those environments, reopening gaps you thought were sealed.
What do you do if rodents are already inside?
Never start permanent exclusion while animals are actively living inside. Sealing them in causes them to chew new exit points, die in walls (creating odor and fly problems), or move deeper into the structure. The correct sequence is: remove first, then seal.
The right order
Confirm active infestation. Fresh droppings (dark and moist), new gnaw marks, or grease smears along baseboards indicate current activity. Old, dry, crumbling droppings suggest a past infestation.
Set snap or electronic traps. Position them along walls and behind appliances where rodents travel. Check traps every 24 hours. Snap traps and electronic traps are the most effective and humane options for quick removal.
Use one-way exclusion devices if needed. These allow animals to exit but not re-enter. They are useful at primary entry points when you want to accelerate removal without trapping animals inside.
Monitor for 5–7 days with no new activity. No fresh droppings, no new gnaw marks, no sounds. Only then is it safe to begin permanent sealing.
Seal all entry points permanently using the materials and methods in the section above.
Clean up. Wear gloves and an N95 respirator when handling traps, droppings, or nesting material. Bag and dispose of carcasses in sealed plastic bags. For significant contamination in an attic or crawl space, attic remediation by a specialist is worth considering — rodent urine and feces in insulation create ongoing health risks.
Regarding poisons: the EPA cautions against using baits as the sole control method. If you use rodenticide bait stations, place them in tamper-resistant stations away from children and pets, and read the label completely. For families with kids or animals, pet- and child-safe pest control practices are worth reviewing before deploying any chemical control.
Pro Tip: Dust a thin line of talcum powder or tracking powder along suspected runways before you set traps. Check it the next morning. Fresh tracks confirm active movement and show you exactly where to place traps for the best results.
How often should you inspect and what does it cost?
Exclusion is durable, but not permanent without maintenance. Structures settle, caulk shrinks, screens corrode, and contractors cut through sealed penetrations during routine repairs. The NPS Rodent Exclusion Manual is explicit: exclusion requires periodic follow-up inspections and is not a set-and-forget solution.
Inspection timeline:
- Immediately after exclusion work: photograph every sealed point for your records
- Spring (March–April): check for winter frost damage to caulk and flashing; look for new gaps from settling
- Late summer/early fall (August–September): rodents seek shelter as temperatures drop — this is when new entry attempts spike
- Annual professional inspection: recommended once a year, especially for attic, roofline, and crawl space areas that are difficult to access safely
Cost snapshot: A professional full-home exclusion typically ranges from $500 to $3,000, depending on home size, construction type, and the number of entry points. DIY material costs for a typical single-family home run well under $200 for hardware cloth, mesh, caulk, and door sweeps — but that figure assumes you can safely reach every entry point, including roofline and attic vents.
DIY exclusion has real limits. Most homeowners find and seal ground-level gaps effectively. Roofline work, chimney caps, and high soffit repairs require ladders, proper fall protection, and often a second person. Professionals also carry warranties on their work, which DIY repairs do not.
Pro Tip: Add “rodent exclusion check” to your annual home maintenance calendar alongside HVAC filter changes and gutter cleaning. Photograph your sealed points after each inspection — that photo record is useful for homeowner’s insurance claims and contractor accountability.
When does it make sense to hire a professional?
Hire a professional when the work involves roofline access, complex utility penetrations, an active infestation you cannot resolve, or when you want a documented warranty. DIY exclusion is reasonable for ground-level gaps and accessible vents. Everything above the first floor, inside the attic, or involving live animals is a different calculation.
Questions to ask any exclusion contractor:
- Do you trap and remove active animals before sealing, or do you seal first?
- What specific materials do you use? (Reject any proposal that relies on foam alone.)
- What is the warranty length and what does it cover?
- Do you provide photo documentation before and after?
- Is follow-up inspection included, or billed separately?
- Are you licensed and insured in this state?
What a professional exclusion visit looks like
- Inspection: The technician walks the full exterior and interior, photographs entry points, and identifies signs of activity.
- Active removal (if needed): Trapping or one-way devices are deployed. This phase runs until activity stops, typically 1–2 weeks.
- Exclusion work: All confirmed entry points are sealed with appropriate materials. A written scope lists every location and material used.
- Follow-up verification: A return visit 2–4 weeks later confirms no new activity and checks seal integrity.
- Annual maintenance plan: A reputable contractor offers or recommends a scheduled annual inspection.
Deliverables you should require in writing: photo documentation of before and after, a written scope with materials listed, warranty terms, and a schedule for future inspections.
Pro Tip: Ask specifically whether trapping is bundled into the exclusion price or billed as a separate service. Some contractors quote exclusion only and charge separately for active removal — knowing this upfront prevents surprise invoices.
Key Takeaways
Effective rodent proofing requires sanitation, mechanical exclusion with chew-proof materials, and confirmed removal of any active animals before permanent sealing begins.
| Point | Details |
|---|---|
| Sanitation comes first | Remove food, water, and nesting material before exclusion work — otherwise rodents return. |
| Seal with chew-proof materials | Use 1/4" hardware cloth, copper mesh, or stainless steel mesh; never rely on foam sealant alone. |
| Remove animals before sealing | Confirm no activity for 5–7 days before permanent exclusion to avoid trapping rodents inside walls. |
| Inspect annually | Structures settle and materials degrade; spring and fall checks catch new gaps before rodents do. |
| Arsenal Pest Control | Provides professional inspection, trapping, and mechanical exclusion across Queen Creek, Gilbert, Mesa, and surrounding Arizona communities. |
The prevention-first approach that actually protects your home
Most rodent problems get addressed backwards. A homeowner spots droppings, buys bait stations, and considers the problem handled. The bait kills some animals. More move in through the same gaps. The cycle repeats every season.
The prevention-first philosophy that Arsenal Pest Control operates on starts with the structure, not the poison. Mechanical exclusion backed by sanitation is the only approach that breaks the cycle permanently. Baits have a role in active removal, but they are a tool in a sequence, not a solution on their own. A home that has been properly inspected, sanitized, and sealed with durable materials simply stops being a viable habitat.
For homeowners in Arizona’s desert communities, the seasonal pressure is real. As temperatures spike in summer and drop in fall, rodents actively seek shelter. Roof rats are particularly common in the Phoenix metro area, and they enter almost exclusively from above — through roofline gaps, unsealed soffits, and uncapped vents. Ground-level exclusion alone will not stop them. That is the gap most DIY guides miss, and it is where professional inspection pays for itself.
Arsenal Pest Control is a family-owned local service that operates without long-term contracts and with eco-conscious treatment options. The goal is always to solve the problem once, correctly, and give homeowners the documentation to prove it.
What Arsenal Pest Control does on a first visit
Skip the guesswork of wondering whether you found every gap. Arsenal Pest Control’s rodent control services cover the full sequence: inspection, photo documentation, active removal when needed, mechanical exclusion with durable materials, and a follow-up visit to confirm that the work held.

On a first visit, a technician walks your full exterior and interior, photographs every suspected entry point, and gives you a written estimate with a clear recommended sequence. If animals are active, trapping comes before any permanent sealing. You get a documented scope, the materials used are listed, and follow-up is scheduled. No long-term contracts, no pressure. For homeowners in Queen Creek, San Tan Valley, Gilbert, Chandler, Mesa, Apache Junction, Florence, and surrounding communities, contact Arsenal Pest Control to schedule an inspection and get a written estimate.
Authoritative sources and where to read more
- CDC: How to Seal Up to Prevent Rodents — The go-to reference for gap sizes, material recommendations, and sanitation steps. Start here if you want the public health basis for exclusion.
- EPA: Identify and Prevent Rodent Infestations — Covers the three-pillar approach (sanitation, exclusion, management) and explains why poisons alone are insufficient.
- NPS Rodent Exclusion Manual — The most detailed technical guide available on mechanical exclusion techniques, materials, and inspection schedules. Consult this for roofline, vent, and chimney specifics.
- ICWDM: Rodent-Proof Construction and Structural Guidance — Best reference for utility penetration repair and material selection, including corrosion-resistant mesh choices for humid or coastal environments.
- Rodent Exclusion Cost Guide — Practical breakdown of professional exclusion pricing ranges and what drives cost differences between partial and full-home work.
- Cornell IPM: Pest Exclusion — Detailed guidance on vent types, chimney covers, hardware cloth installation, and the “rat wall” technique for crawl space perimeters.
Recommended
- Safe Pest Control for Kids and Pets: A Family Guide – Arsenal Pest Control
- What Is Termiticide? A Practical Guide for Homeowners – Arsenal Pest Control
- Why DIY Pest Control Fails: What Homeowners Must Know – Arsenal Pest Control
- Pet Safe Pest Treatments for Your Home: 2026 Guide – Arsenal Pest Control
