


Termite mud tubes are earthen tunnels that subterranean termites build to travel between soil and wood while staying hidden and moist. Finding one on your property is usually a strong sign of active termite activity, not just a cosmetic issue. Photograph the tube, leave it intact, and schedule a professional inspection before doing anything else.
TL;DR:
- A repaired mud tube within 48 hours indicates an active colony, but abandonment of a tube does not necessarily mean the termites are gone.
- Thick, heavily trafficked tubes typically signal ongoing activity, while exploratory or drop tubes suggest different stages of colony expansion or movement.
- The location of mud tubes matters; interior or upper-wall tubes often indicate a more serious infestation and require specialized treatment.
- Colony size can reach hundreds of thousands of termites and persist for years with silent damage, often linked to indoor moisture problems.
- A comprehensive professional inspection is essential for accurate diagnosis and effective treatment planning, as surface signs alone can be misleading.
Table of Contents
- What Do Termite Mud Tubes Look Like?
- Where Mud Tubes Show Up and Why Location Matters
- How Do You Test if a Mud Tube Is Active?
- Why a Few Mud Tubes Can Mean a Much Bigger Problem
- What Treatment Actually Looks Like
- What to Do the Moment You Spot a Tube
- What Inspectors Actually Look for on a Termite Call
- Get a Professional Read on What You Found
- Sources
What Do Termite Mud Tubes Look Like?
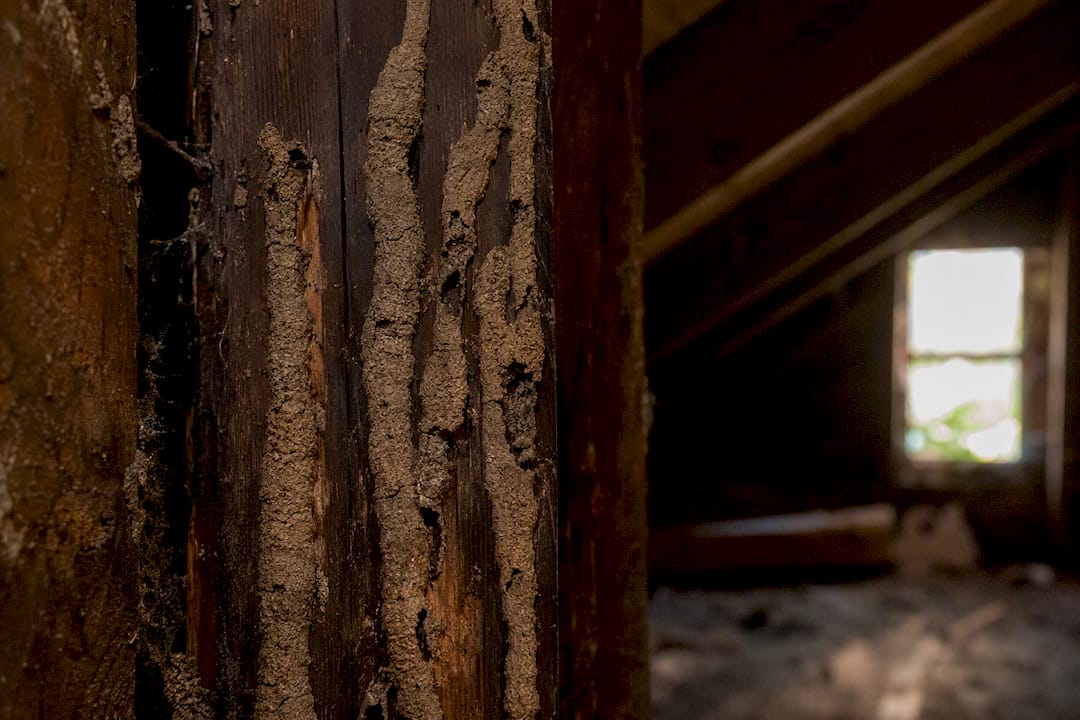
A typical mud tube is roughly pencil-width, though thickness varies naturally with age and termite activity. Fresh tubes look damp, tan to dark brown, and slightly soft to the touch. Old, abandoned tubes turn gray, crumbly, and brittle, which is exactly why an empty-looking tube doesn’t mean the problem is over. Termites can rebuild pathways elsewhere on the structure, and a crumbling tube is not proof the colony is gone.
Extension entomologists group mud tubes into four main categories, each telling you something different about colony behavior:
- Exploratory tubes extend upward from soil with no clear destination. Termites build them while scouting for new food sources, so they’re often thin and don’t reach wood.
- Working (utility) tubes connect the soil directly to a food source and carry heavy termite traffic. These are the thickest, most active tubes you’ll find.
- Drop tubes hang from wood or overhead structures back down toward the soil, often forming after termites finish feeding in one spot and need a route back down.
- Swarm (castle) tubes are wider, chimney-like structures built near the soil surface just before a swarm event, when winged reproductives leave to start new colonies.
Certain termite species build thicker, branching tube networks compared to natives, which can indicate the species involved. Tube diameter and branching pattern give an inspector real clues about which species is involved before they even open a wall.
Where Mud Tubes Show Up and Why Location Matters
Where you find a tube often matters more than what it looks like. Common spots include:
- Foundation walls, the most frequent site, where soil-to-structure contact is closest.
- Crawl space piers and support posts, easy to miss without a flashlight and a reason to look.
- Plumbing penetrations, where pipes create gaps and moisture that termites exploit.
- Interior ceilings or upper walls, a far more serious find.
A tube on the foundation indicates termite entry points. Tubes inside, especially on ceilings or upper walls, can signal an aerial infestation relying on internal moisture. That distinction changes the entire treatment approach, so tell your inspector exactly where you found each tube, not just that you found one.
How Do You Test if a Mud Tube Is Active?
You can run one simple, low-risk test before your inspection appointment, and it takes less than 48 hours to get an answer.
- Photograph the tube first, ideally with a coin or ruler in frame for scale.
- Break away roughly one inch of the tube using a screwdriver or similar tool, then mark the spot with tape or chalk.
- Wait 24 to 48 hours and check the break.
- Look for fresh mud sealing the gap, visible worker termites, or dampness around the repair.
A tube that gets repaired within that window is strong evidence of an active colony. No repair doesn’t guarantee the colony is inactive, though. Termites sometimes abandon a specific tube while remaining active elsewhere on the structure, which is why this test supports a professional inspection rather than replacing one.
Pro Tip: Do this test on only one tube, and only after you’ve photographed everything. Breaking multiple tubes before an inspector arrives destroys the tube map they’d otherwise use to trace entry points and species behavior.
Why a Few Mud Tubes Can Mean a Much Bigger Problem
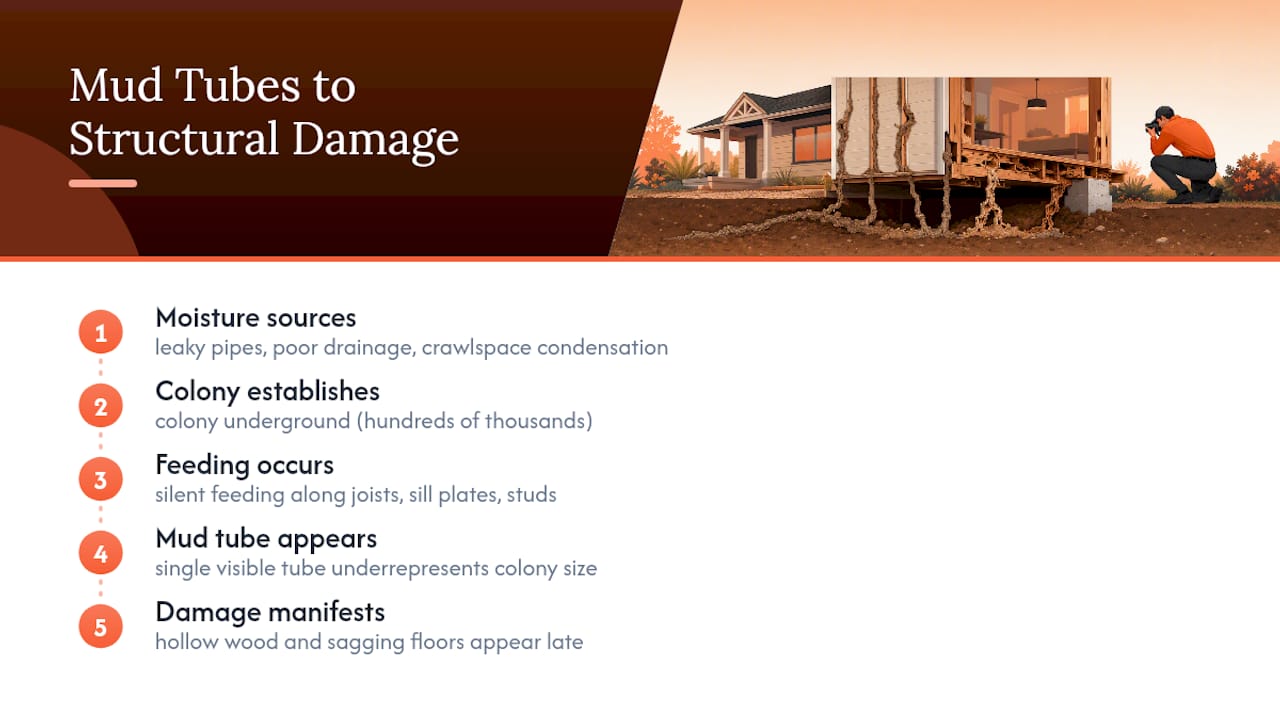
A single visible tube rarely reflects the true size of the colony behind it. Subterranean termite colonies can number in the hundreds of thousands of individuals and persist undetected for years before a tube ever becomes visible on the surface.
That gap between what you can see and what’s actually happening inside your walls is the real risk. Feeding damage accumulates gradually and silently, often along joists, sill plates, and wall studs, long before it shows up as sagging floors or hollow-sounding wood. Moisture is the common thread tying all of this together. Leaky pipes, poor drainage, and condensation inside crawl spaces create the humid conditions subterranean termites need, and they’re frequently what allows a colony to establish itself indoors in the first place.
What Treatment Actually Looks Like
Treatment depends on where the colony lives and how it’s accessing your structure, which is why a licensed inspection comes before any recommendation. The main approaches include:
- Soil-applied non-repellent termiticides, which create a treated zone around the foundation perimeter. Termites can’t detect and avoid the chemical, so they pick it up and carry it back into the colony, producing a slower but broader kill.
- Bait systems, installed in the ground around the structure and monitored over time, which target the colony itself rather than just the perimeter. These work well for ongoing monitoring on top of an existing treatment.
- Localized foam or spot treatments, injected directly into accessible galleries or void spaces. These handle a specific, confirmed access point but won’t reach a colony a technician can’t locate.
- Borate treatments, applied to exposed wood during repairs, which protect replacement lumber from future attack rather than treating an active infestation.
Soil termiticides remain the backbone of perimeter defense for ground-level colonies, but they don’t address an aerial infestation living inside a wall cavity with its own moisture supply. Those cases usually need targeted interior treatment paired with fixing whatever leak or condensation problem is feeding the colony. A technician who understands different treatment classes will match the method to what they actually find, not apply the same approach to every job.
What to Do the Moment You Spot a Tube
Getting this part right protects both your home and the inspector’s ability to diagnose the problem correctly.
- Photograph every tube you find, noting the exact location on the structure.
- Leave the tubes intact except for the single break test described above.
- Keep the area accessible by clearing storage boxes, debris, or vegetation nearby.
- Call a licensed inspector as soon as possible, especially if you notice repaired tubes, live workers, tubes in multiple locations, or any tube found indoors.
- Skip the hardware-store spray as a fix. Consumer sprays and removing tubes yourself typically don’t reach or eliminate the underground colony.
Old, abandoned-looking tubes deserve the same caution as fresh ones. A dried-out tube can be a snapshot of past damage rather than a signal the colony left, and the same logic applies to other legacy structural damage. Distinguishing old woodworm holes from active ones in wood repairs follows a similar principle: age alone doesn’t tell you whether the underlying problem is resolved.
What Inspectors Actually Look for on a Termite Call
An inspection isn’t a quick glance at the tube you found. Technicians map every tube on the property, checking whether they’re moist and active or dry and abandoned, then probe surrounding wood for softness or hollow spots that indicate feeding damage.
Moisture sources get checked too, since they’re often the reason a colony took hold indoors in the first place. Foundation type, construction materials, and where tubes cluster all shape which treatment approach makes sense. No two homes get an identical plan, because no two infestations follow an identical path into the structure. Homeowners should expect a written report explaining what was found, what’s recommended, and options for pet-safe and family-safe treatment where children or animals are part of the household.
— Arsenal Pest Control
Get a Professional Read on What You Found
Photos and a break test tell you a lot, but they can’t tell you how far a colony has spread through your walls or whether you’re dealing with an aerial infestation. Arsenal Pest Control offers a free termite inspection that includes tube mapping, moisture checks, and wood probing, the same diagnostic steps described above, so you get a written report and real treatment options instead of guesswork.

If the inspection confirms activity, you’ll walk away knowing exactly which treatment fits your situation, whether that’s a soil barrier, bait system, or targeted interior work for an aerial colony, along with eco-friendly and family-safe options where they matter to your household. Homeowners in Queen Creek and the surrounding East Valley can also look into dedicated termite removal services once treatment needs are confirmed. Book your inspection now before a small tube becomes a much bigger repair bill.
Sources
- Monitoring and management of eastern subterranean termites (NC State Extension)
- Signs of termite infestation (Mississippi State University Extension)
- Subterranean termites and mud tubes (UAEX FSA-7061)
- Termites: how to identify and control them (EPA)
Recommended
- Termite Inspection Queen Creek, AZ | Free Inspection Services
- Free Termite Inspection | Expert Termite Control & Treatment
- Wood Destroying Insect Inspection: What Buyers Need to Know – Arsenal Pest Control
