


Perimeter pest treatment is the targeted application of insecticides in a continuous band around a home’s foundation that kills pests on contact before they enter the building. Unlike interior spraying, this method intercepts ants, cockroaches, spiders, and other crawling insects at the point where they first approach your home. The industry standard for this technique is the 6-foot crossing zone, which covers 3 feet up the foundation wall and 3 feet out on the ground. Arsenalexterminating applies this method across Queen Creek, Gilbert, Mesa, and surrounding Arizona communities to give homeowners a proactive line of defense against invasive pests.
What is perimeter pest treatment and how does it create a barrier?
Perimeter pest treatment works as a contact-kill barrier, not a repellent. Pests must physically cross the treated zone, where the insecticide kills them before they reach your walls or doors. That distinction matters because it means thorough surface coverage is non-negotiable.
The industry standard calls for treating a 6-foot crossing zone: 3 feet up the foundation wall and 3 feet out on the ground. This dual coverage intercepts both ground-crawling insects like ants and earwigs and climbing pests like spiders and stink bugs. Treating only the ground or only the wall leaves half the pest population with a clear path inside.
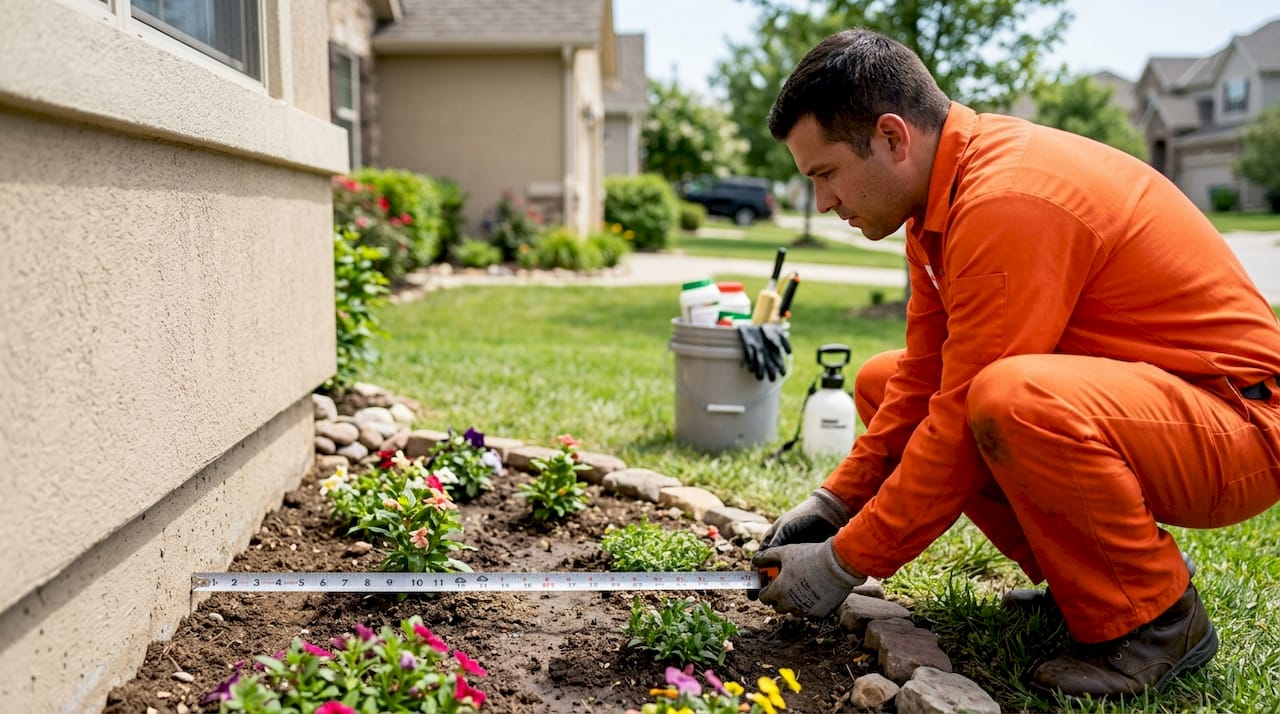
Volume matters as much as placement. A standard home with 150–200 linear feet of perimeter requires 2–4 gallons of finished solution to reach the visibly wet saturation point. Under-application is the leading cause of treatment failure, meaning pests break through despite the attempt.
Professional programs often use a dual-layer approach that pairs liquid insecticide bands on foundation zones with granular products in mulch or soil. The granular layer resists rain and irrigation better than liquid alone, extending barrier longevity between service visits.
- 6-foot crossing zone: 3 feet up the wall, 3 feet out on the ground, applied continuously around the entire foundation.
- Visible saturation: The surface must appear wet during application. Dry-looking spots signal under-application.
- Dual-layer protection: Liquid bands on the foundation combined with granular products in adjacent soil or mulch.
- Targeted placement: Integrated Pest Management (IPM) principles from the US EPA call for treating confirmed pest travel paths, not broad surface areas.
- Pest range: Common targets include ants, spiders, cockroaches, stink bugs, fleas, ticks, silverfish, earwigs, centipedes, and crickets.
Pro Tip: Apply treatments in late afternoon or early evening. UV light degrades active ingredients, so minimal sunlight exposure during and after application extends the residual life of the barrier.
How often should you schedule perimeter pest control?
Frequency is what separates a working pest barrier from a one-time attempt that fades within weeks. Professional programs schedule treatments every 70–90 days, totaling 4–5 visits per year. That cadence aligns with seasonal pest pressure cycles, so the barrier stays active when pest activity peaks in spring and summer.
- Start with an interior treatment if an active infestation already exists inside the home. Applying a perimeter barrier over an active interior problem traps pests inside rather than stopping them at the door.
- Schedule the first exterior treatment once interior pest activity is resolved or confirmed absent.
- Maintain a 70–90 day service interval to prevent gaps in coverage as residual products break down.
- Adjust timing seasonally in Arizona, where scorpions and bark beetles are most active from march through october, requiring tighter scheduling during those months.
- Request a post-rain inspection after heavy monsoon activity, since water can wash granular products out of soil and dilute liquid bands on foundation surfaces.
Drying time runs 2–4 hours after application. Pets and people should stay off treated surfaces until the product is fully dry. Arsenalexterminating technicians communicate this window clearly at the end of every visit so there is no guesswork about when it is safe to resume normal outdoor activity.
What does a professional perimeter pest service cost?
Multi-visit professional perimeter programs start around $435 annually. That figure reflects the cost of 4–5 service visits per year, not a single application. A single visit costs less upfront but leaves the property unprotected for months at a time.
Standard service visits take 30–60 minutes. During that window, a technician inspects moisture sources, cracks, and pest nesting sites before applying treatment. Inspection-guided placement is what separates professional service from a homeowner walking the perimeter with a store-bought sprayer.
- Inspection first: Technicians identify active entry points, moisture problems, and nesting zones before any product is applied.
- Targeted application: Product goes where pests actually travel, not uniformly across every surface.
- Customer communication: A good technician explains what was found, what was treated, and what the homeowner should watch for before the next visit.
- Pet and people safety: Treated areas need 2–4 hours of drying time. Keep children and pets indoors or in untreated areas during application.
- DIY limitations: Homeowner DIY efforts frequently fail due to insufficient volume, incorrect targeting, and lack of professional-grade equipment. Professional service also ensures legal compliance with pesticide application regulations.
The value of professional service is similar to the case made for hiring a specialist over DIY for other home systems: the upfront cost is higher, but the results are consistent and the risk of costly mistakes drops sharply.
Pro Tip: Ask your technician to document the specific entry points and moisture sources found during inspection. That record helps you prioritize structural repairs that make the chemical barrier more effective.
How does perimeter treatment fit within integrated pest management?
Perimeter pest treatment is one tool within a broader system called Integrated Pest Management, or IPM. The US EPA’s IPM principles define this approach as targeted, environmentally sensitive pest control that minimizes chemical use by focusing applications only where pest travel is confirmed. A perimeter barrier applied without IPM thinking is just spraying. A perimeter barrier applied with IPM is a precision tool.
The most important insight from IPM is that chemical barriers fail when structural gaps remain open. Sealing cracks, gaps around pipes, and spaces under doors is not optional maintenance. Unsealed entry points make a chemical barrier as effective as a fence with an open gate.
Environmental management works alongside the chemical barrier to reduce pest pressure at the source:
- Moisture control: Fix leaking irrigation, clear standing water, and repair gutters. Moisture attracts cockroaches, earwigs, and silverfish before they ever reach the foundation.
- Vegetation management: Trim shrubs and trees away from the foundation. Plant material touching the wall gives climbing pests a bridge over the treated zone.
- Debris removal: Clear leaf litter, wood piles, and mulch buildup within 12 inches of the foundation. These materials are nesting sites for ants, scorpions, and centipedes.
- Lighting adjustments: Switch exterior lights to yellow or sodium vapor bulbs. White lights attract flying insects, which in turn attract spiders and scorpions that feed on them.
The shift from reactive interior treatment to proactive exterior treatment reduces the need for intensive indoor pesticide use. That means fewer chemicals inside the home where your family spends most of their time.
| Prevention layer | Method | Primary benefit |
|---|---|---|
| Chemical barrier | Liquid and granular perimeter application | Kills pests on contact before entry |
| Structural exclusion | Seal cracks, gaps, and pipe penetrations | Removes physical access routes |
| Environmental management | Moisture control, vegetation trimming | Reduces pest attraction and nesting sites |
| Scheduled maintenance | 70–90 day service intervals | Sustains barrier through seasonal pest cycles |
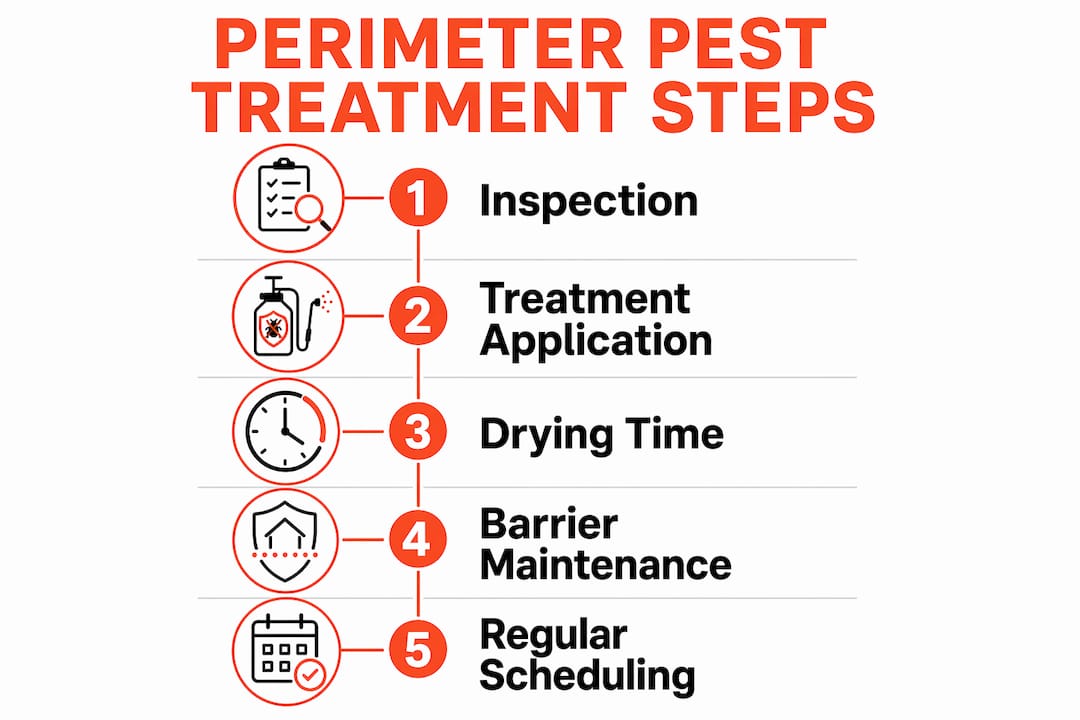
Arsenalexterminating builds all four layers into its residential pest control programs, treating the perimeter as part of a complete property protection plan rather than a standalone product.
Key Takeaways
Perimeter pest treatment works because it combines precise chemical application, structural exclusion, and scheduled maintenance to stop pests before they reach the interior of your home.
| Point | Details |
|---|---|
| 6-foot crossing zone | Treat 3 feet up the foundation wall and 3 feet out on the ground for full coverage. |
| Volume is critical | A 150–200 linear foot home needs 2–4 gallons of solution to reach effective saturation. |
| Service frequency | Schedule treatments every 70–90 days to maintain a continuous barrier year-round. |
| IPM integration | Pair chemical barriers with structural exclusion and environmental management for lasting results. |
| Professional advantage | DIY applications consistently fail due to low volume, poor targeting, and lack of inspection. |
What I’ve learned from years of perimeter inspections
The most common mistake I see during property inspections is not a wrong product choice. It is under-application. Homeowners walk the perimeter with a gallon sprayer, hit the visible spots, and assume the job is done. The barrier looks complete but has gaps every few feet where the solution ran dry. Pests find those gaps within days.
The second pattern I see constantly is treating the perimeter while ignoring what is directly adjacent to it. A freshly treated foundation band means nothing when a pile of bark mulch sits against the wall and a dripping irrigation head keeps the soil wet. Those conditions override the chemical barrier entirely.
What actually works is treating the perimeter as part of a system, not a single event. The homeowners who get the best results are the ones who schedule regular service, fix the moisture issues their technician flags, and trim the vegetation back from the foundation between visits. The chemical barrier buys time. The structural and environmental work is what makes that time count.
Perimeter treatment is not a one-and-done fix. It is ongoing property care. The homeowners who treat it that way stop calling us about active infestations and start calling us only for scheduled maintenance. That is exactly where you want to be.
— Arsenal
Arsenalexterminating’s perimeter pest control programs
Arsenalexterminating serves Queen Creek, San Tan Valley, Gilbert, Chandler, Mesa, Apache Junction, Florence, and surrounding Arizona communities with perimeter pest control built on IPM principles and professional-grade application standards.

Every program starts with a thorough inspection to identify entry points, moisture sources, and active pest travel paths before any product is applied. Technicians use both liquid and granular products to build a dual-layer barrier that holds up through Arizona’s monsoon season and peak pest activity months. There are no long-term contracts, and every visit includes a clear explanation of what was found and treated. Explore Arsenalexterminating’s full pest control services or learn more about the team’s eco-friendly approach to safe, effective pest management.
FAQ
What is the 6-foot crossing zone in perimeter pest treatment?
The 6-foot crossing zone is the industry standard application area covering 3 feet up the foundation wall and 3 feet out on the ground. This dual coverage intercepts both ground-crawling and climbing pests before they reach entry points.
How long does perimeter pest treatment take to dry?
Treated surfaces typically require 2–4 hours of drying time before people and pets can safely re-enter the area. Technicians advise keeping children and animals away from treated zones until the product is fully dry.
How often should perimeter pest control be applied?
Professional programs schedule treatments every 70–90 days, totaling 4–5 visits per year. That interval maintains a continuous barrier through seasonal pest pressure cycles and prevents gaps in coverage as residual products break down.
Why do DIY perimeter treatments often fail?
DIY applications fail primarily because of insufficient chemical volume and incorrect targeting. Professional equipment delivers consistent coverage across the full 6-foot crossing zone, and trained technicians identify pest travel paths that homeowners typically miss.
Does perimeter treatment work without sealing entry points?
A chemical barrier alone is significantly less effective if cracks, gaps, and pipe penetrations remain open. Unsealed entry points allow pests to bypass the treated zone entirely, so structural exclusion is a necessary companion to any perimeter treatment program.
Recommended
- Home new – Arsenal Exterminating Pest Control Services
- Services – Arsenal Exterminating Pest Control Services
- Pest Control Services Queen Creek, AZ | Arsenal Exterminating
- Pest Control Services Gilbert AZ | Arsenal Pest Control
